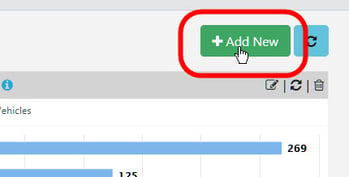
Click on the green + Add New button.
The New Metric form opens.
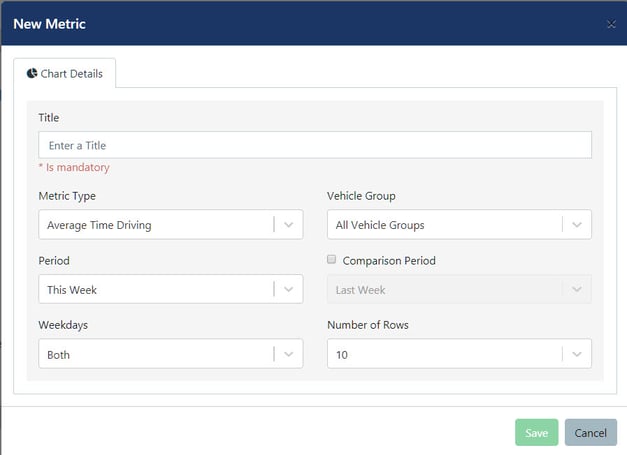
Type in a Title for the new metric – this is mandatory. Choose a name that describes the metric (usually the Metric Type, but could include more information such as the Vehicle Group or period e.g. weekly).
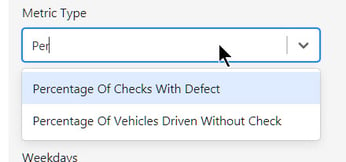
Select the Metric Type from the drop-down menu.
Note: You can type in the search box to narrow the list or find the specific Metric Type.
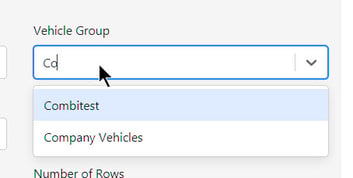
Select the Vehicle Group or leave the default as ‘All Vehicle Groups’.
Note: As above, you can type in the search box to narrow the list or find the specific Vehicle Group.
Select the Period from the drop-down menu. This can be one of the default periods such as ‘Last Week’, ‘Last Month’ etc. Note: ‘Year To Date’ is the period from 1st January until now.
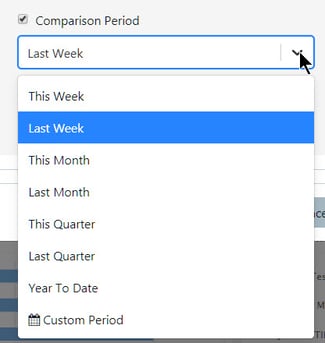
Alternatively, to set a different period, select ‘Custom Period’ from the list.
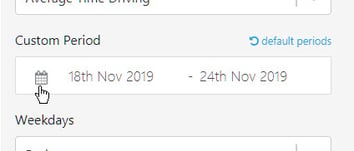
The current week will selected by default.
Click on the calendar icon.
The calendar will open with the default current week highlighted. Note: The start date is highlighted in the Custom Period box with a green underline.
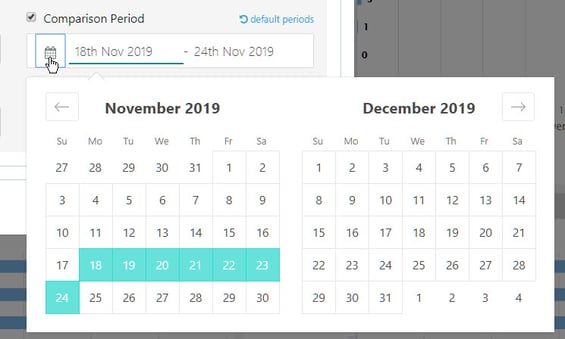
Click on your required start date.
Note: The selected day turns darker green and the date appears in the Custom Period box. The green underline switches to the end date.
Click on your required end date.
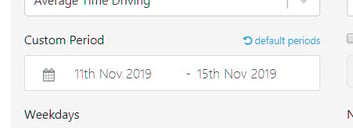
The Calendar will close and your chosen period will appear in the Custom Period box.
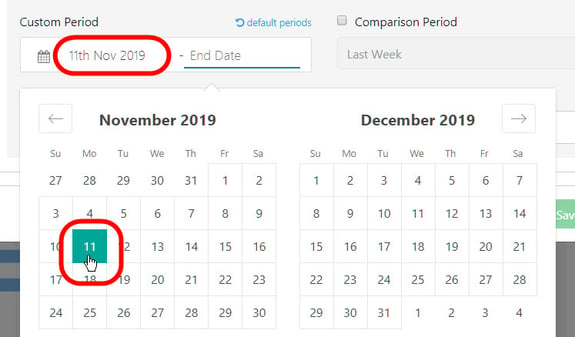
If you want to change the start date, click on the first date in the Custom Period box to re-open the calendar and select a new start date.
If you want to change the end date, click on the second date in the Custom Period box to re-open the calendar and select a new end date.
To return to the drop-down list of default periods, click on default periods above the Custom Period box.
Note: For most metrics you can also select a second period to compare against the first in the graph. This is covered in How can I compare metric data from two periods in the Dashboard?
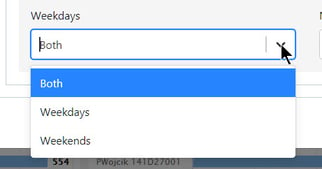
Click on the Weekdays drop-down menu to select only ‘Weekdays’, only ‘Weekends’ or the default ‘Both’ to be included from the custom period.
Click on the Number of Rows drop-down menu to select the number of top vehicles in the group, e.g. selecting 5 rows will display only the top 5 vehicles with the largest values.
Click on the green Save button.
The new metric will appear after the other metrics in the Dashboard.
To resize the metric and/or move it to a different position on the Dashboard, see How can I move and resize metrics in the Dashboard?.