[Stops/Idling Scheduled Report] - How to filter some events out of your Stops/Idling Schedule Report?
e.g.: You can filter events over 15 minutes out of your Stops/Idling Schedule Report.
- Log in to your Transpoco account.
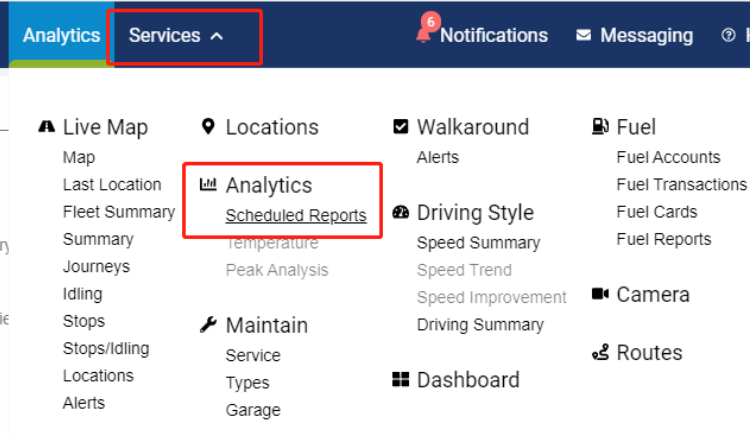
- Click the Services > Analytics > Scheduled Reports.

3. You will see the Scheduled Report page.
4. Then click on the “+ Add New Schedule Report”
.
5. Firstly, you need to add a subject and a description.
6. Then select the Report Types "Stops/Idling"
7. Then you can add different vehicle groups or all vehicles.
8. Then click on the “Next”
.
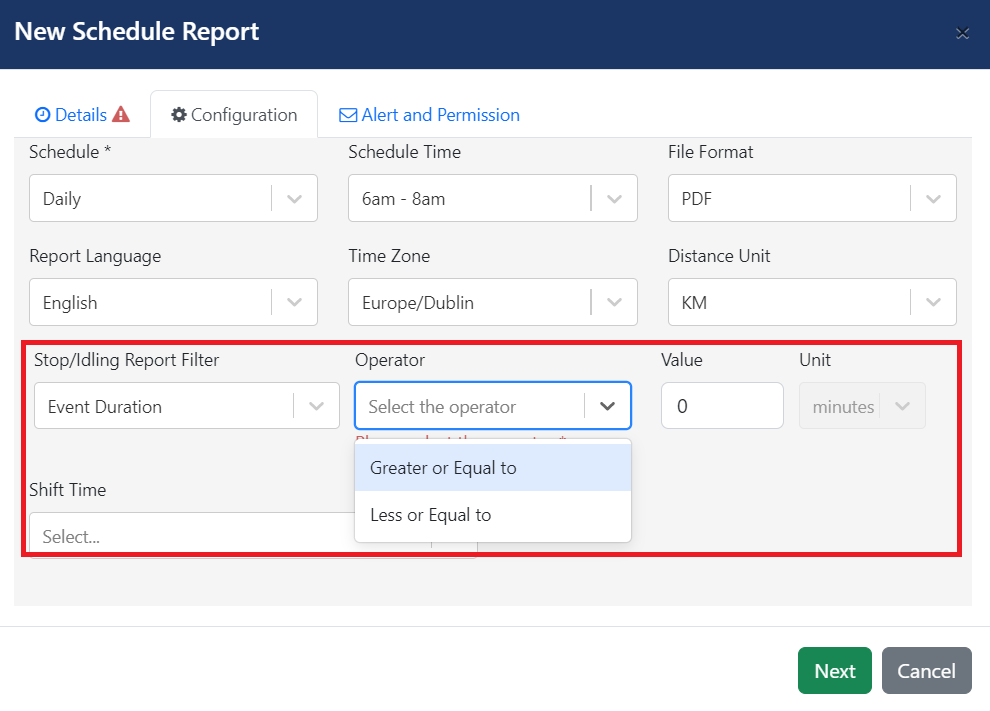
9. Then set up the following options, Schedule period, Schedule Time, Report Language, Time Zone and Distance Unit.
10. Then select CSV as the File Format.The next step is where you can filter events out of the schedule report.
11. Then you can select to have only events greated or equal to 15 minutes for instance into your scheduled report. This means all events less than 15 minutes will be ignored and not displayed in the report.
12. Then click on the “Next”
again.
13. Then choose the users who would like to receive the report based on scheduled period and time; as well as the users who can manage the schedule report.
14. Click on the “Confirm”
once you are done.
- Click the Services > Analytics > Scheduled Reports.