What are scheduled reports?
The Scheduled Reports module allows you to configure a report from a range of available reports and to send the report by email to selected recipients on a daily, weekly or monthly frequency. You can create as many scheduled reports as you want. Scheduled reports allows you to view key data for your fleet without the need to log-in to to your Transpoco account.
Where are the Scheduled Reports in your account?
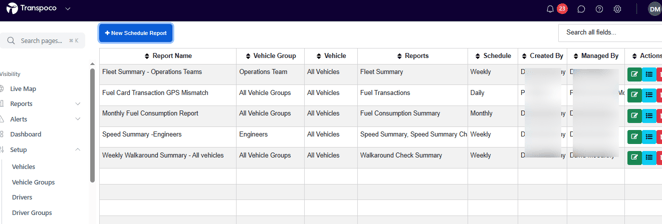
You can find Scheduled Reports on the Navigation menu > Visibility > Setup > Scheduled Reports

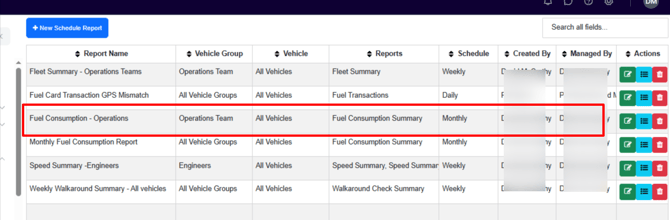
When you open Scheduled Reports you can view the existing scheduled reports created in your account. In the example below, you can see scheduled reports created in a Transpoco account.
The standard information contained in this table covers the following:
- Report Name: Name of the Scheduled Report
- Vehicle Group: Vehicle Group included in the Scheduled Report
- Vehicle: Single vehicle included in the Scheduled Report
- Reports: Pre-defined Generated Reports included in the Scheduled Report
- Schedule: Frequency of Scheduled Report
- Created By: User who created the Scheduled Report
- Actions: Edit or delete the Scheduled Report, and show the schedule history
What scheduled reports are available?
The available reports in your Transpoco account will depend on your subscription. For example, if you do not have access to Walkarounds, you will not have access to create scheduled reports for walkarounds.
Here is a list of all available Report Types in scheduled reports:
Report Types in Scheduled Reports* |
||
| Alerts | Idling | Speed Chart |
| Driving Summary | Journeys | Stops |
| Engine | Last Location | Stops/Idling |
| Fleet Summary | Locations | Summary |
| Fuel Consumption | Notifications | Temperature |
| Fuel Consumption Summary | Services | Walkaround Check Summary |
| Fuel Transactions | Speed Summary | Walkaround Check Completed |
*As mentioned, the report types available in your account will depend on your subscription.
How to create a new scheduled report?
In this example, we will create a scheduled report for Fuel Consumption for a selected vehicles group for a monthly frequency.
1. Click on the blue +New Schedule Report button above the list of Scheduled Reports.
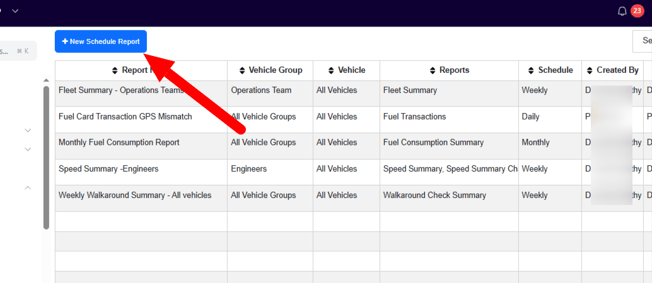
2. The form opens with blank fields and three tabs. Note: fields with an asterisk must have criteria added.
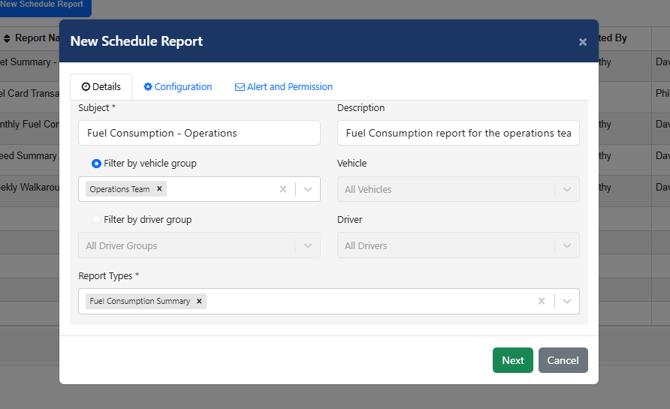
- Type a subject name, which will be the name of the Scheduled Report being created (e.g. Fuel Consumption).
- Type a brief description of what the Scheduled Report is about (e.g. Fuel consumption for the operations team group of vehicles)
The Scheduled Report can be filtered by vehicles or drivers.
To filter by vehicles:
- To select a vehicle group to be included in the Scheduled Report, either leave ‘All Vehicles’ (default) or choose one or more vehicle groups from the Filter By Vehicle Group drop-down list.
- Alternatively, select one vehicle from the Vehicle drop-down list if the Scheduled Report is to only include a specific vehicle.
To filter by drivers:
- To select a driver group to be included in the Scheduled Report, either leave ‘All Driver Groups’ (default) or choose one or more driver groups from the Filter By Driver Group drop-down list.
- Alternatively, select one driver from the Driver drop-down list if the Scheduled Report is to only include a specific driver.
- Choose the reports to be included in the Scheduled Report by selecting one or more from the drop-down list (e.g. Journey; Summary).
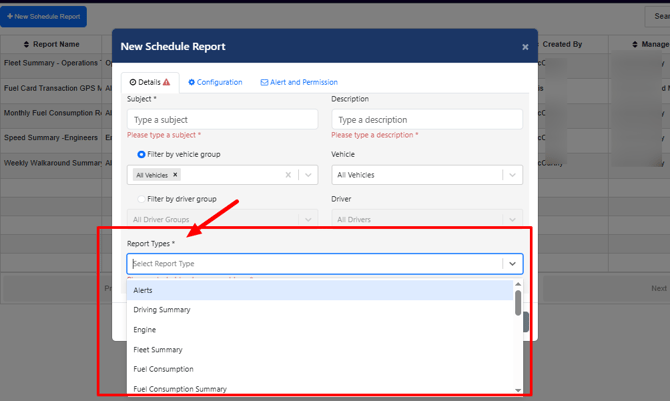
Selecting a Report Type:
-
From the list of available report types I selected the Fuel Consumption Summary.
3. Click on the Next button to advance to the Configuration tab.
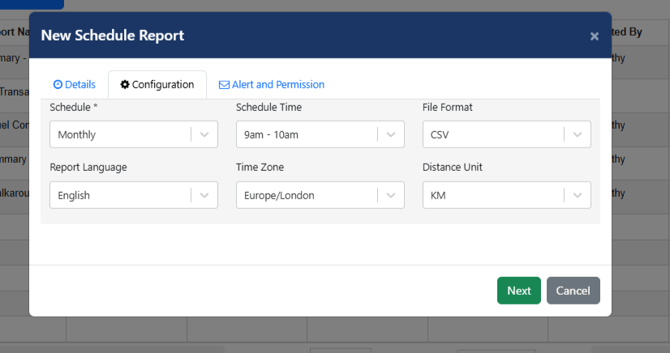
- Select Daily, Weekly or Monthly from the Schedule drop-down menu (default is Daily).
- Select the two-hour time slot for creating and sending the report from the Schedule Time drop-down menu (default time is 6am – 8am).
- Choose the file format (PDF or CSV) in the File Format drop-down menu (default is PDF).
- Choose the language of the report (currently English, French or Spanish) from the Report Language drop-down menu (default is English).
- Choose the required time zone (currently Dublin, Paris or Madrid) from the Time Zone drop-down menu (default is Dublin).
- Choose the preferred unit of distance (kilometres or miles) from the Distance Unit drop-down menu (default is KM, but can be changed to miles for UK users).
In this example, I configured the report to send monthly, in a CSV format and will be sent delivered between 9am-10am. I did not have to alter the language, distance or time zone.
4. Click on the Next button to advance to the Alert and Permission tab.
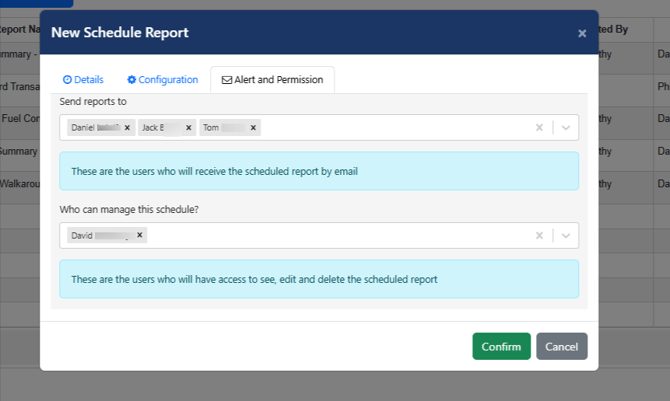
- Select the name(s) of the intended recipient(s) of the Scheduled Report from the Send Reports To drop-down menu.
- Select the name(s) of the users who will be granted access to see, edit and delete the Scheduled Report from the Who Can Manage This Schedule? drop-down menu.
- Click on the Confirm button to create the new Scheduled Report.
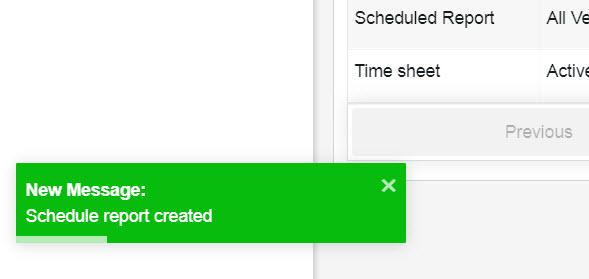
You will briefly see a message in the bottom left of the screen to confirm the new Scheduled Report has been created.
5. The new scheduled report has been added to the list of existing scheduled reports. The scheduled will send every month until the frequency has been changed or the report has been deleted.