Exception reporting shows instances in which actual performance deviated from expectations for driving style and safety (speeding, harsh braking, rapid acceleration, idling) or for location and activity (when vehicles start or stop or when they reach a precise location or get in or out of a designed area). These instances can be sent as alerts by email or text to specified recipients, and are viewable in reports.
The following list of alerts is not exhaustive and alerts can be set for any requirement that may arise.
- Operating out of hours
- Speeding above threshold
- Engine On/Off
- Location activity
- Geofence entry/exit
- Unexpected changes in fuel levels/usage
- Unauthorised use (driver-ID not presented)
- Excessive idling
- Rapid/harsh acceleration
- Harsh braking
- Impact with both engine on and off
- Excessive stop time
- Low battery alerts
- Failed/disconnected battery alerts
- External vehicle power off (vehicle battery removed)
- External vehicle power on (vehicle battery connected)
- Tow away detected (vehicle is moving, but ignition is off)
- Tow away completed (vehicle not moving for 5 minutes after a tow away period)
- GPS tamper (occurs when GPS antenna is removed or a fault occurs)
- GSM signal jamming detected
- View alerts in a report
There are currently two ways to view alerts:
- Select Alerts from the Reports drop-down menu in the Report Generator.
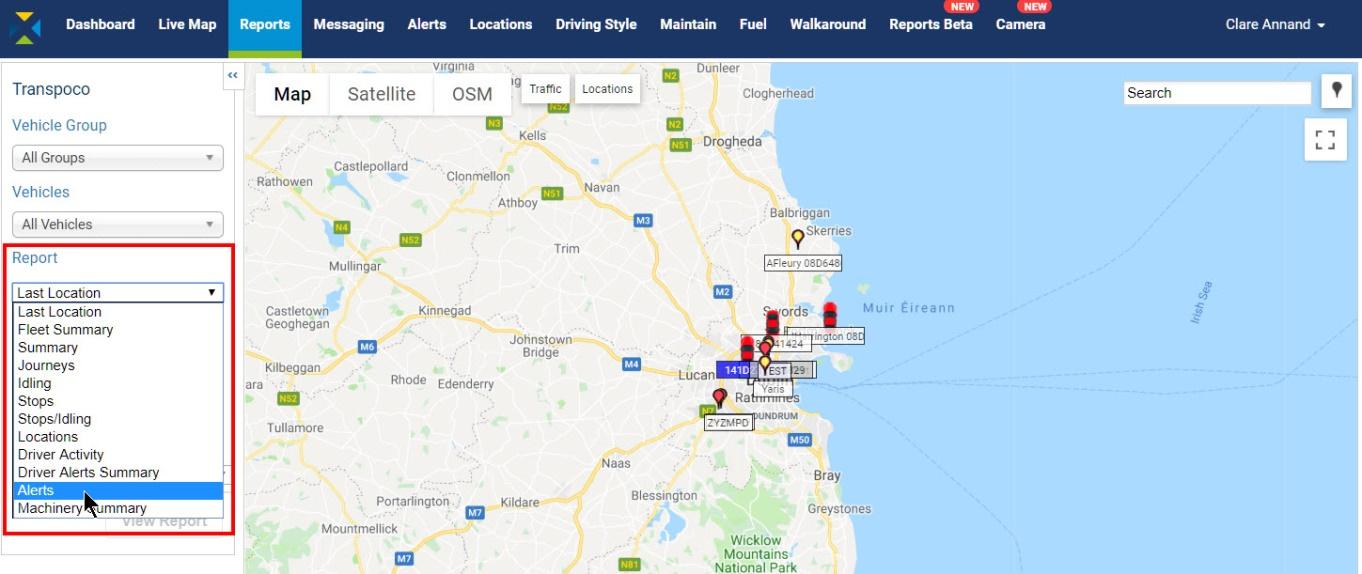
- Click on Alerts in the tabbed menu.
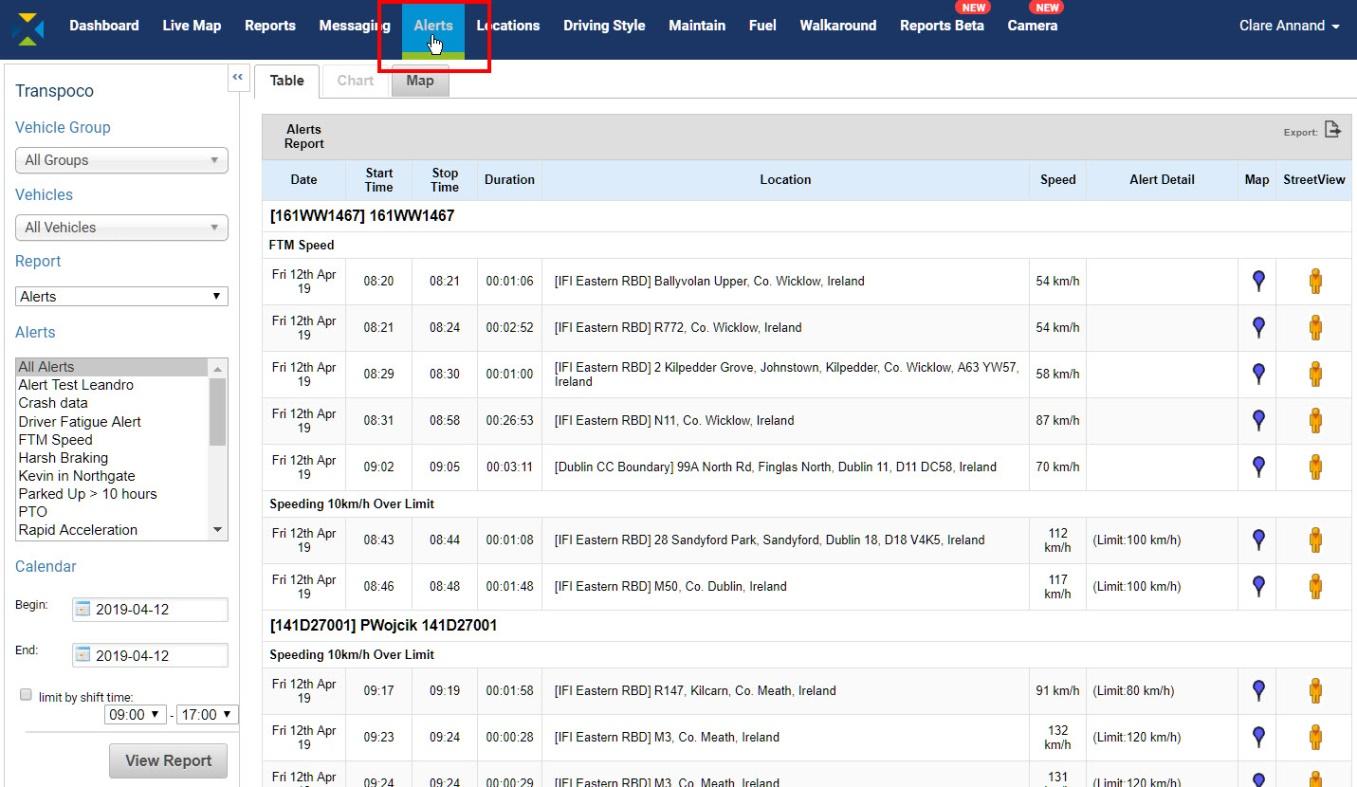
Whichever method is used, the default report opens, which contains all alerts for all vehicles for the current day (00.01 to the time the report opened) as shown in the previous image.
The standard information (can be customised) contained in this report covers the following for each exception occurrence:
- Date: Date the exception occurrence took place
- Start Time: When the exception occurrence started
- Stop Time: When the exception occurrence ended
- Location: Where the exception occurrence took place
- Speed: Speed recorded by the GPS tracker
- Alert Detail: Information relevant to the exception occurrence, e.g. the speed limit.
- To view a specific alert, select that alert from the Alerts drop-down menu.
- Select the vehicle group that you wish to include in the report from the Vehicle Group drop-down menu, or leave as All Vehicle Groups (default).
- Select an individual Vehicle from within that group on which to run the report, or leave as All Vehicles (default).
- Choose the required Begin and End Dates from the Calendar for the period you wish the alerts to cover.
- If you wish to filter the results to include only alerts incurred during the shift time, check the Limit by Shift Time box, and choose Begin and End Times from the respective drop-down menus. (Note: it is possible to view out of hours alerts by selecting evening/nights times.)
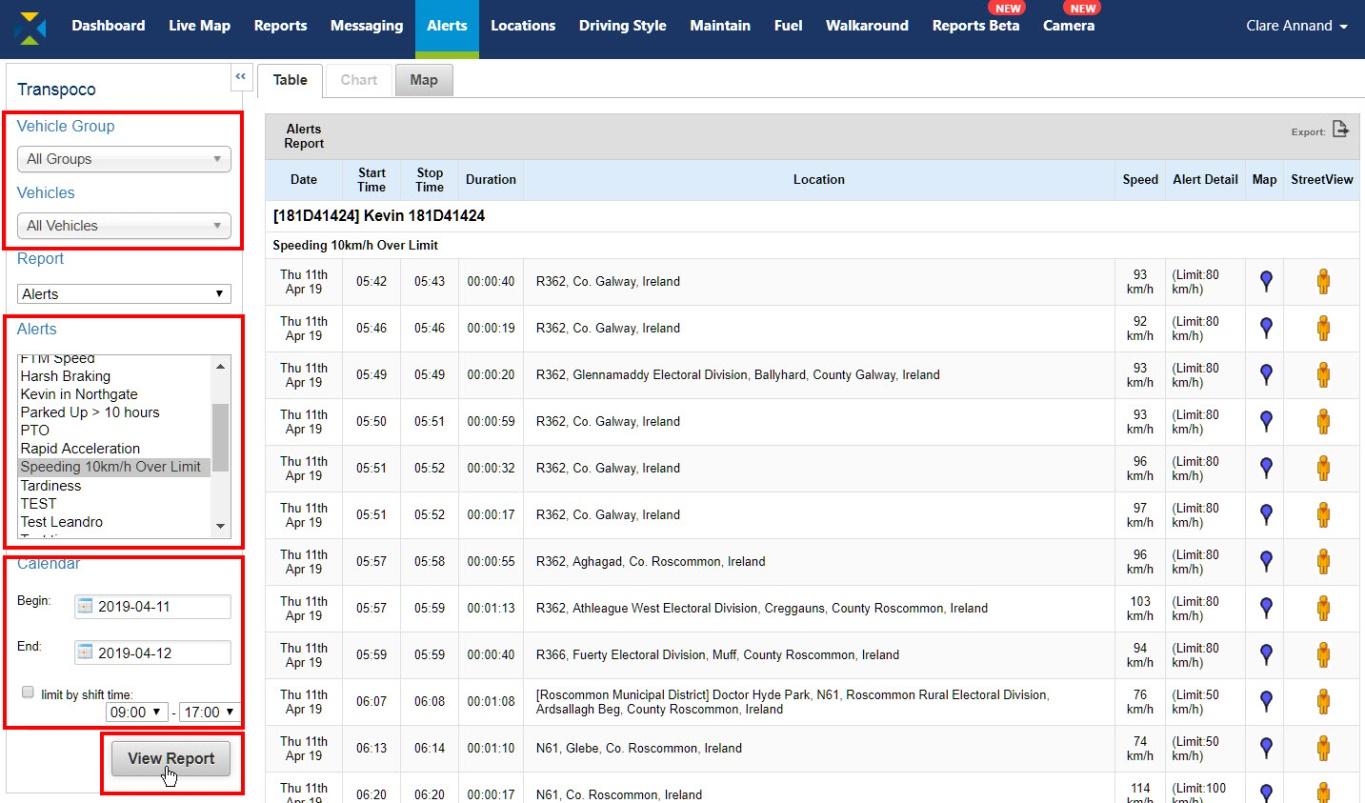
The example above shows all occurrences of all vehicles driving at least 10km per hour over the road speed limit on one day.
- Click the blue map icon on the right side of the row to view that incident on the map.
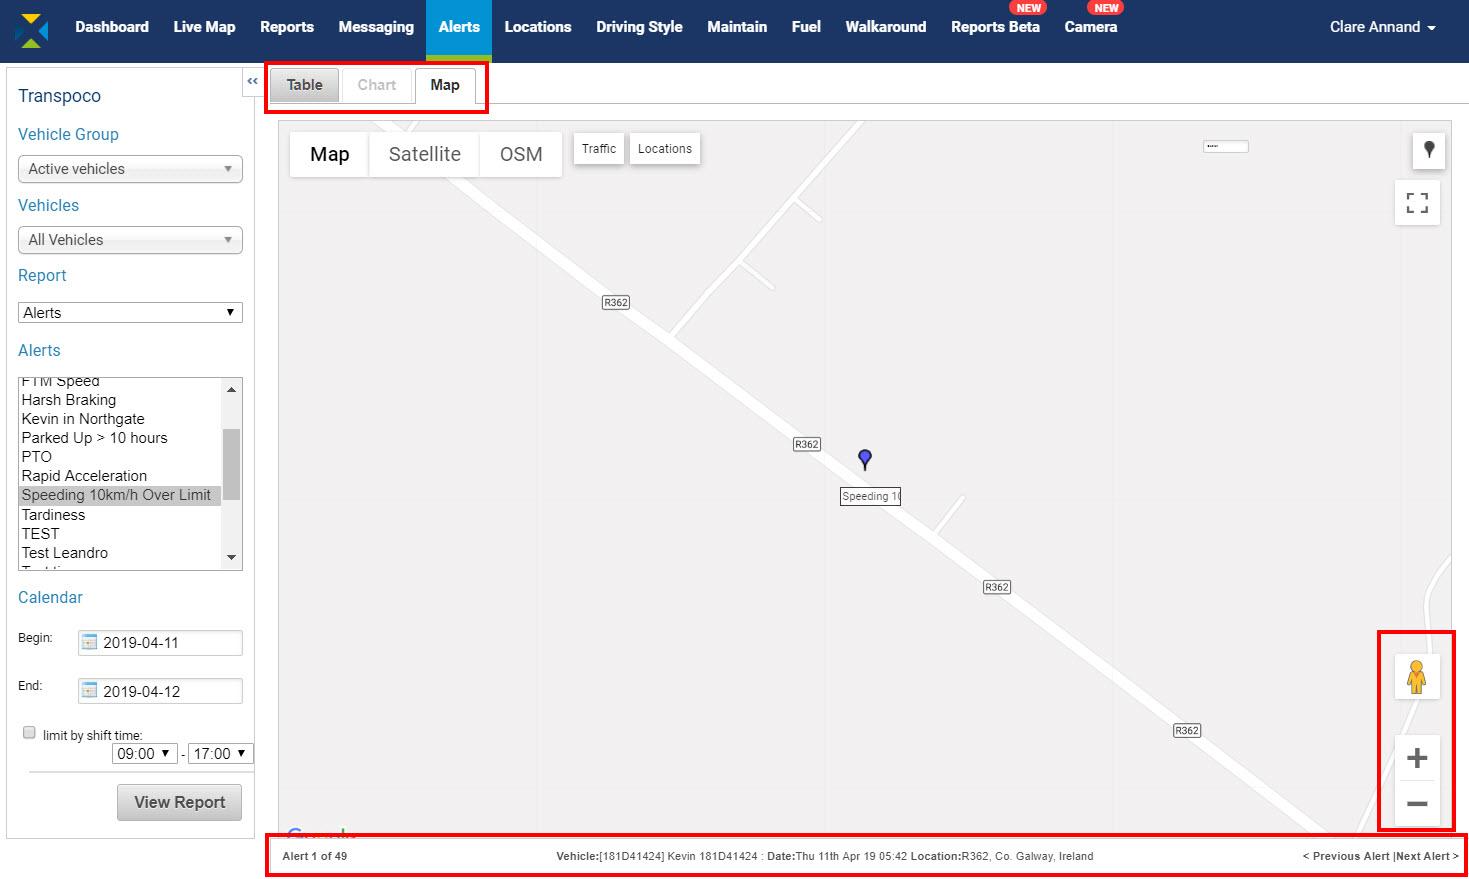
- Use the Google map functions to zoom in/out of the map, or view the location in Street View.
The information bar at the bottom shows which number alert of the total alerts is being viewed (e.g. Alert 1 of 49), and the details of the vehicle/driver, date and time, and the location.
- To view scroll though the alerts, click on the Previous Alert and Next Alert links on the far right of the information bar.
- To return to the table of alerts, click on the Table tab.
- To go directly to the location in Street View from the table, click on the yellow Street View icon.
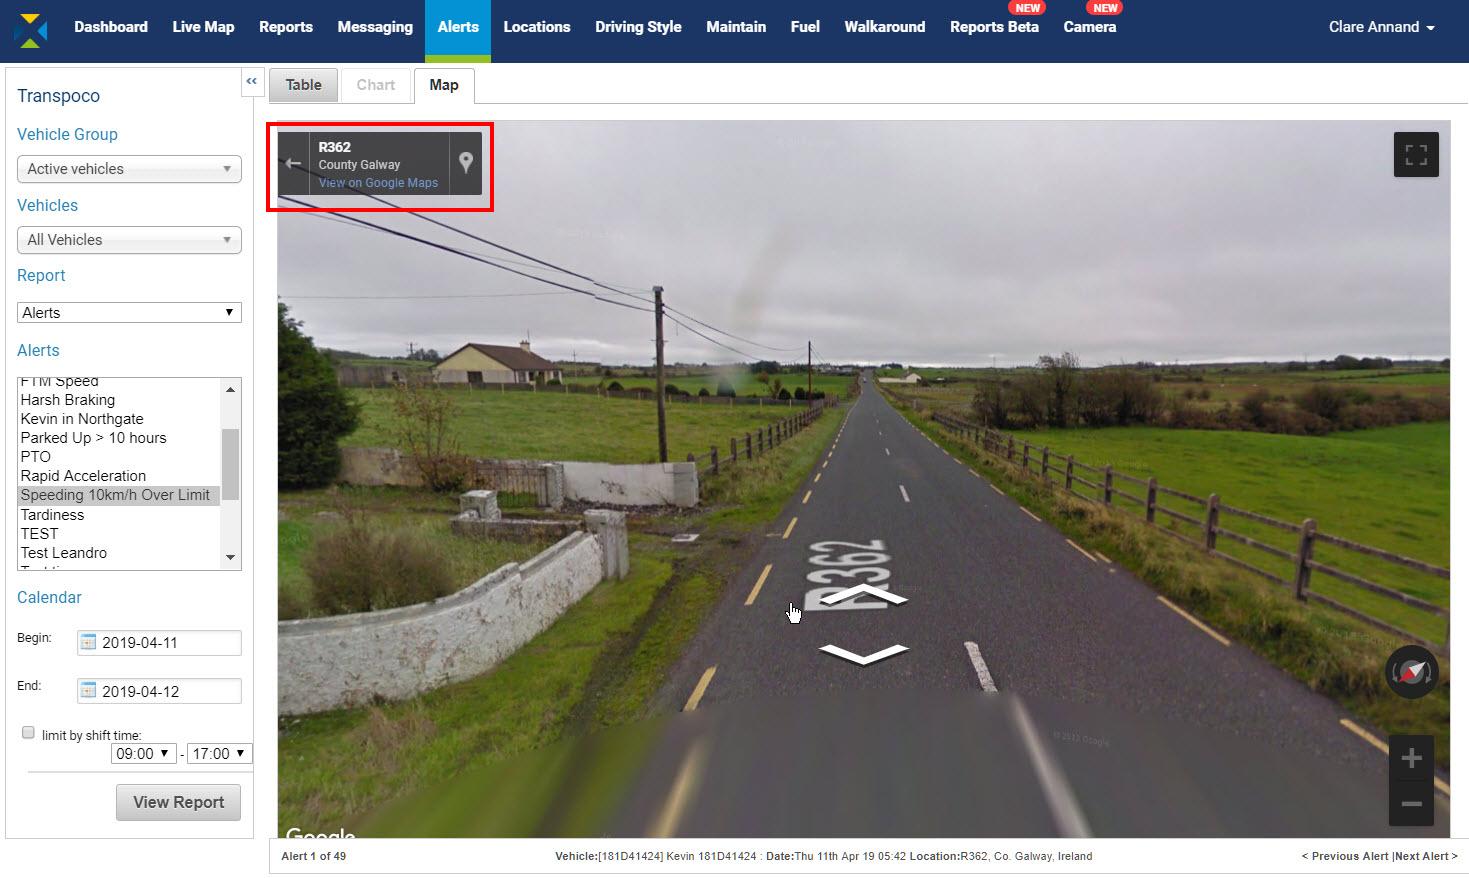
- As well as the features mentioned above for the map view, Street View includes an option to view in Google Maps. To do this, click on the View on Google Maps link in the top left-hand corner.
- To return to the map view, click on the left-facing arrow.
- To return to the table of alerts, click on the Table tab.
Note: If the report includes the current day, the results upon returning to the table may now include more occurrences as the report is re-run when it reloads.
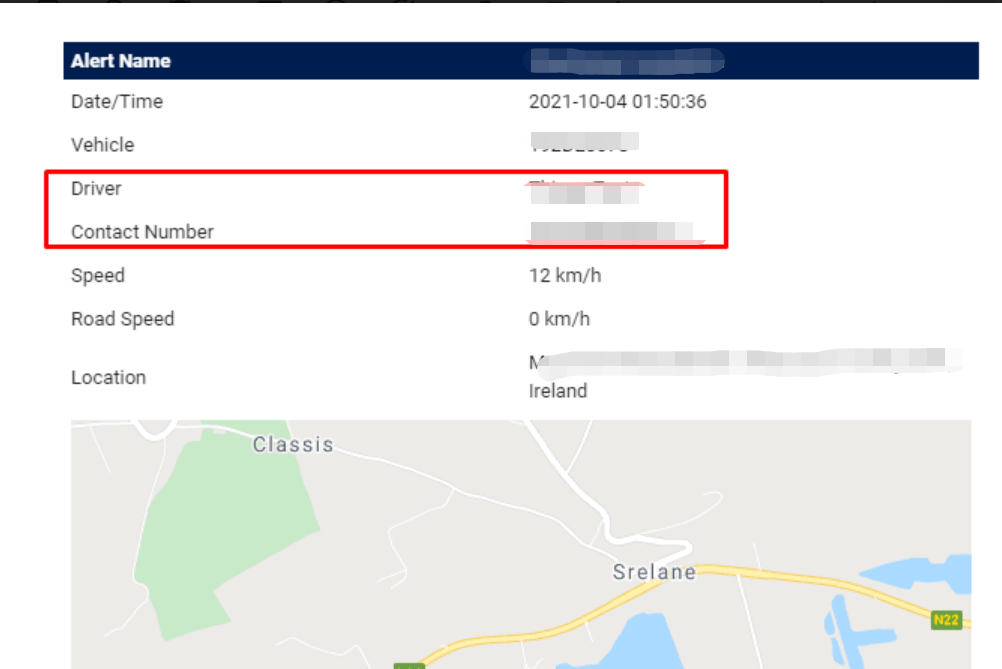
Please find below an example of speeding alert sent by email.
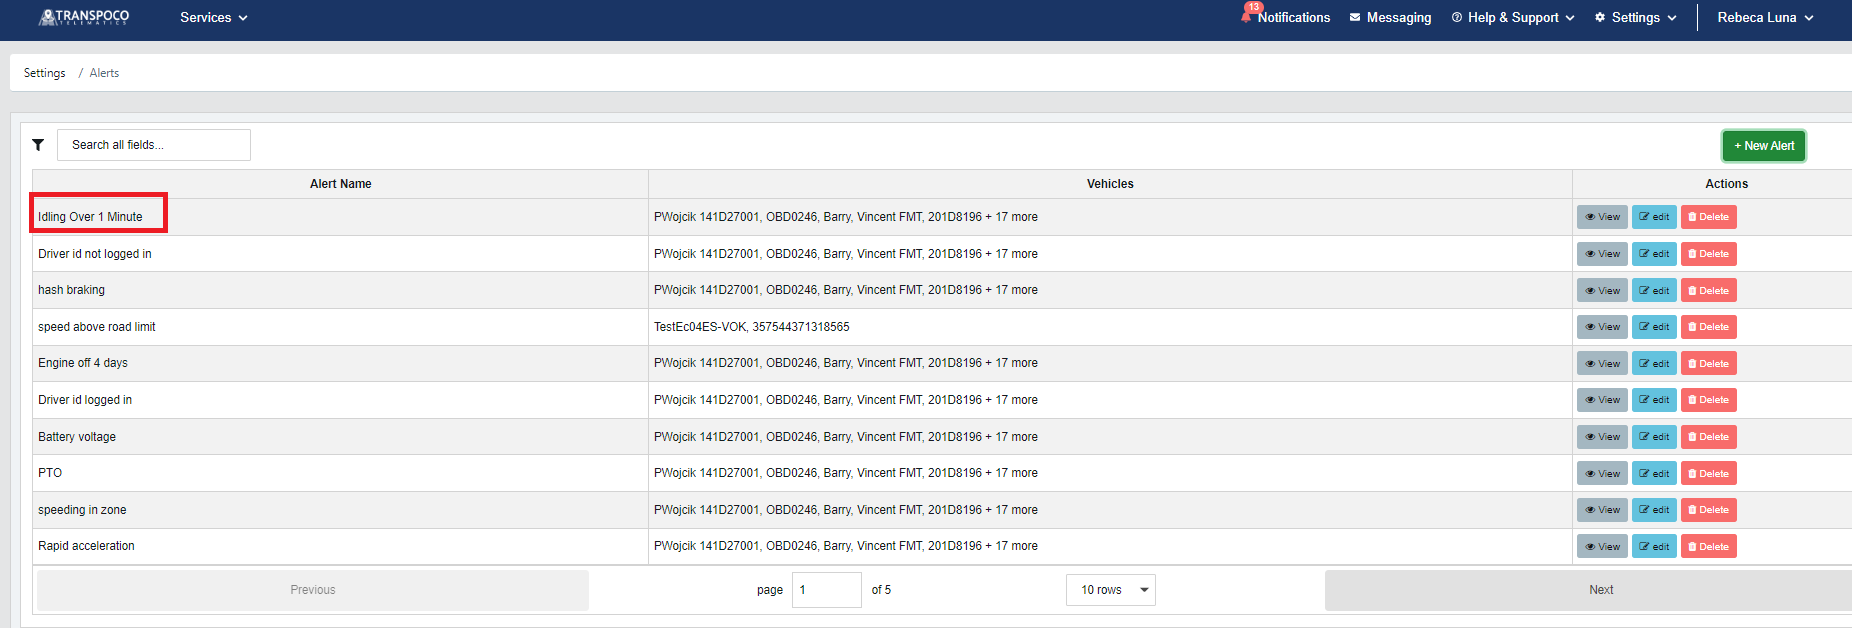
2. Managing alerts
Users with sufficient permissions can create, amend and delete alerts.
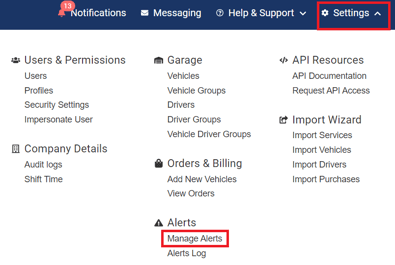
- Click on Settings
- Click on Manage Alerts in the Settings menu.
A table containing all the current available alerts is presented.
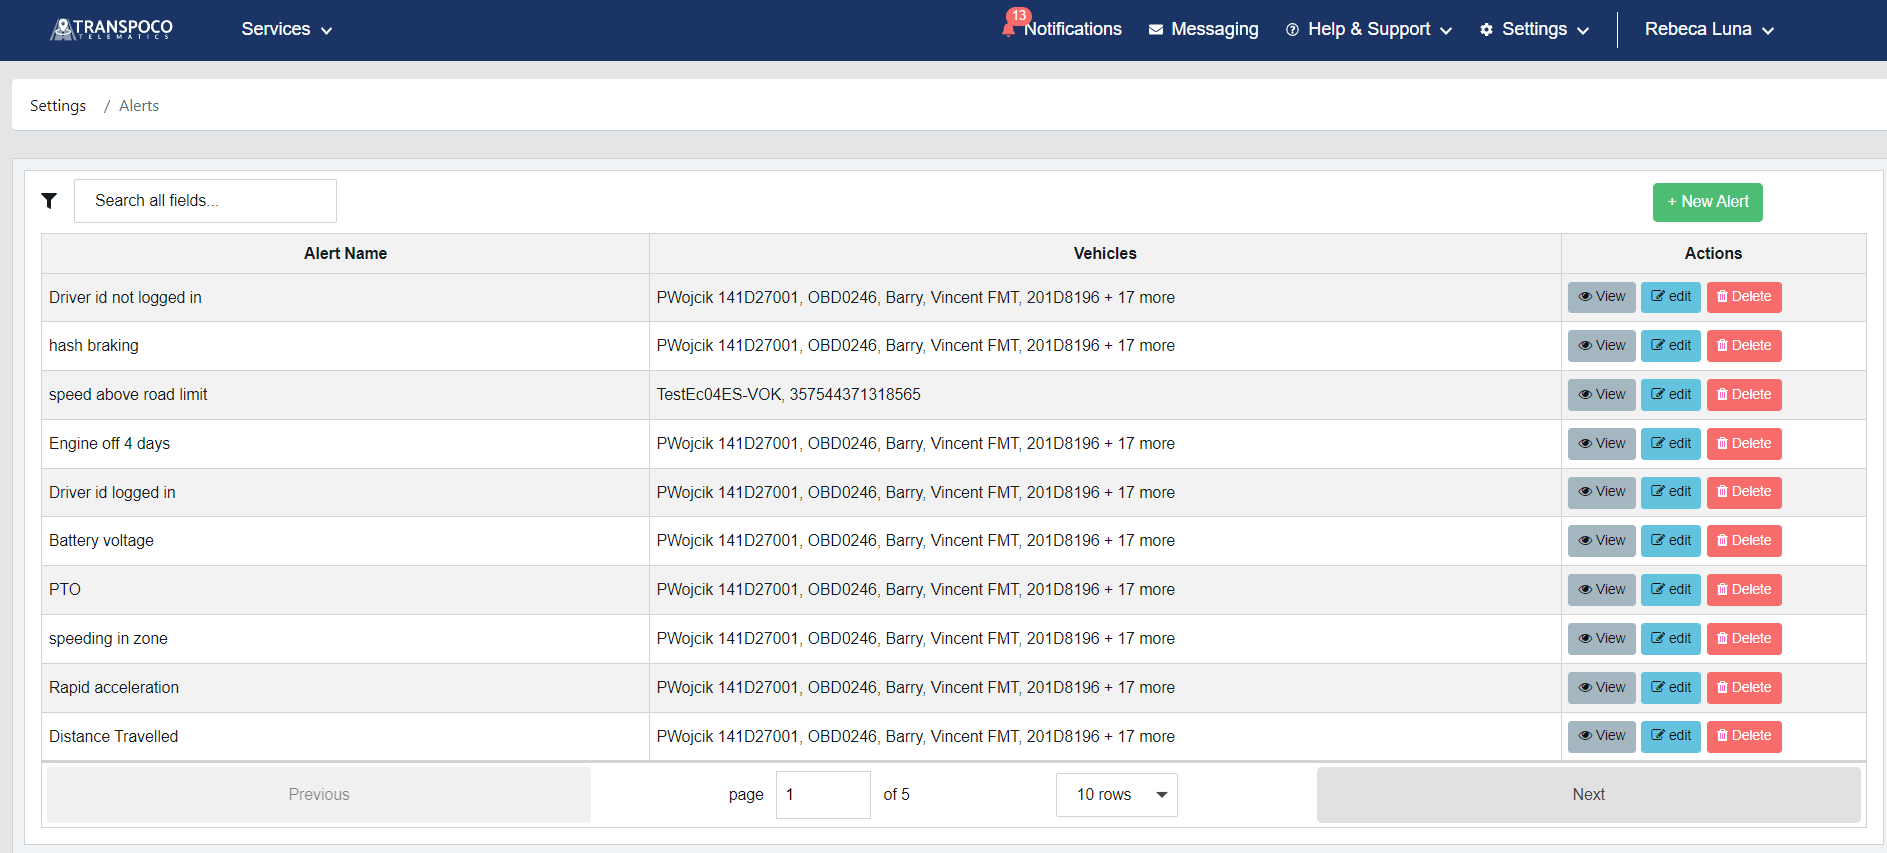
3. Create an alert
- Click on the + Add New Alert button above the table. The Setup form opens.
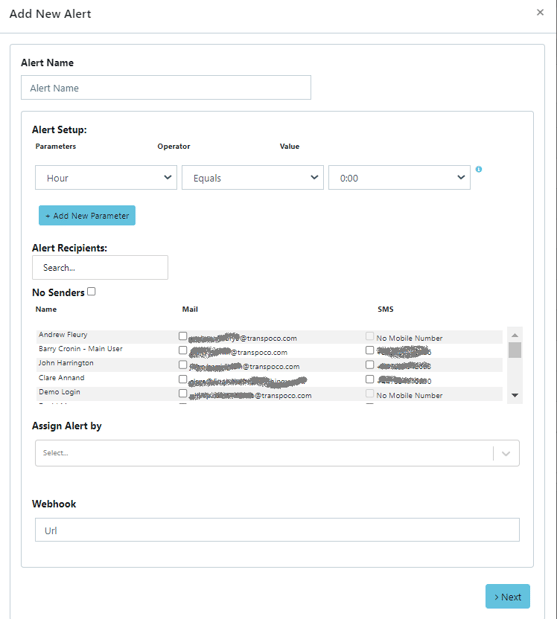
- Type in the alert name, using something meaningful to describe what it is for (e.g. Idling Over 1 Minute).
- Next you will add the parameters for the alert. Combining parameters and values create different alerts, and additional parameters can be added to the available list by administrative users.
As an example, to create an alert on vehicles idling for longer than a minute, do the following:
- Select Engine from the drop-down list of parameters, Equals from the drop-down list of Operators and On from the drop-down list of values.
- Click on + Add New Parameter.
- Select Speed from the drop-down list of parameters, Equals from the drop-down list of Operators and 0 from the drop-down list of values.
- Click on + Add New Parameter.
- Select Active Duration from the drop-down list of parameters, Greater Than from the drop-down list of Operators and 1 from the drop-down list of values.
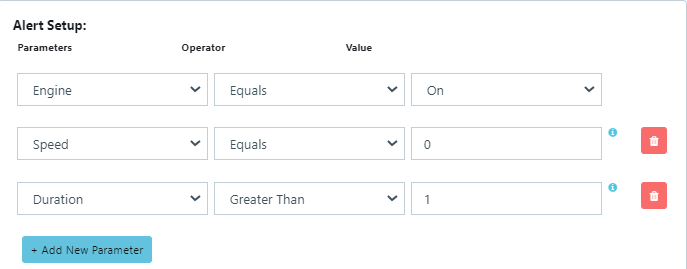
This means SynX will create an alert every time a selected vehicle has its engine on without moving for longer than a minute.
As you can see, the Values change depending on the Parameter.
- Check the relevant email and/or SMS boxes for the intended recipients of the alert or check the 'No Senders' box to only create the alerts report but to not send the alert to anyone.

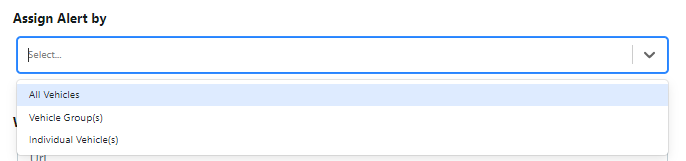
- You can then assign the alert to all vehicles or a group of vehicles or an individual vehicle.
-
You can also enter the URL of an application if the alert is to be deliver there.
Check the details for the alert; if you need to make any changes, click the Change link for that section.
- Click the NEXT button.
You will see a summary of the alert you are creating with the status per vehicles which shows if that vehicle can have this alert assigned to it. You can see in the example below that some vehicles from the list don't have this alert available for their type of tracker unit. At this moment you can edit or alert or proceed with it knowing these vehicles won't have the alert assigned to them.
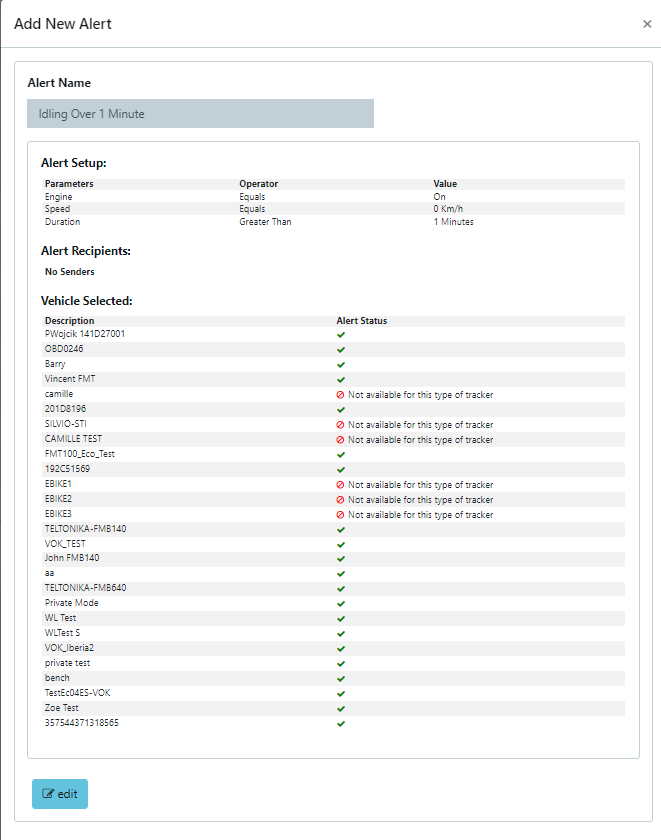
- Now click to confirm or edit the alert. If clicked on 'edit' you will get back to the previous screen. If clicked on 'confirm' you will see the new alert in the list of alerts created.
Instructions on creating alerts for locations and geofences are included in Section XX.
Help with creating specific alerts can be sought from the Transpoco Support Team.
4. Amend an existing alert
- From the list of alerts, click on the relevant Edit button.
- From the list of alerts, click on the relevant Delete link.
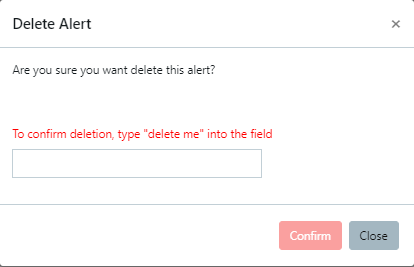
- Write 'delete me' in the field available and click to confirm it. The alert will be removed from you list.