How do I apply different shift times to my scheduled reports?
You can apply customized shift times to the main reports in the scheduled report section. Please find the detailed instructions below:
Log in to your Transpoco account.
- Click on the Services > Analytics > Scheduled Report.
- You will see the scheduled reports page, then click on the “+ New Schedule Report”.
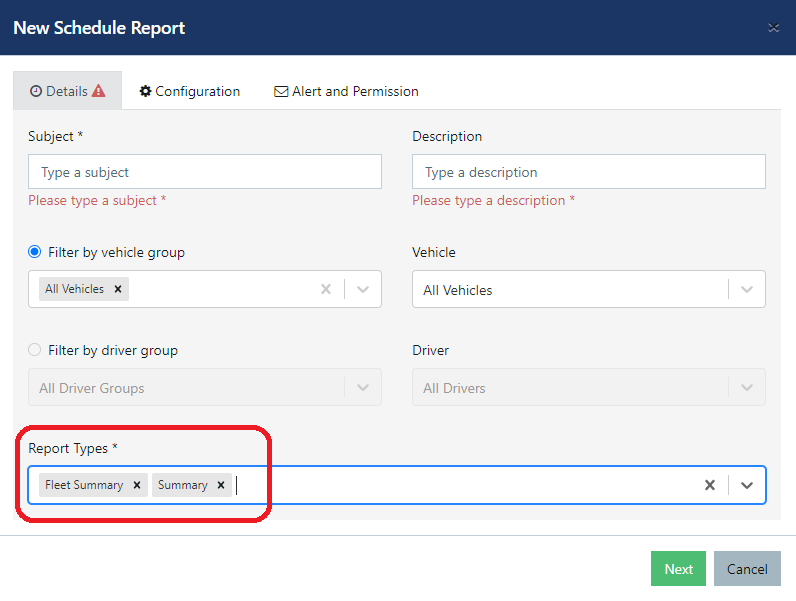
- Type in “Subject”, “Description”, select “Vehicles” or “filter by vehicle groups”, and then select one or more of the following options: Fleet Summary, Summary, Journeys, Idling, Idling/Stops and/or Stops.

- Then click “Next”
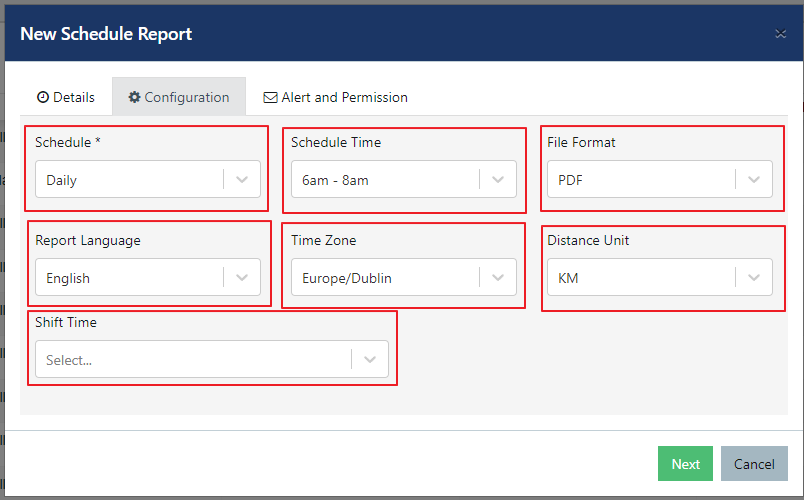
, go to the “Configuration”
.
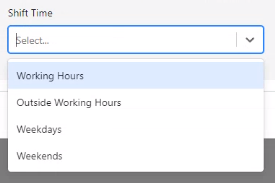
- Set the following options: Schedule period, Schedule Time, File format, Report Language, Time Zone, Distance Unit and Shift time and click on "Next".
Note: Please check here to see how you can set up the customised shift times which will be displayed in the Shift Time list below.


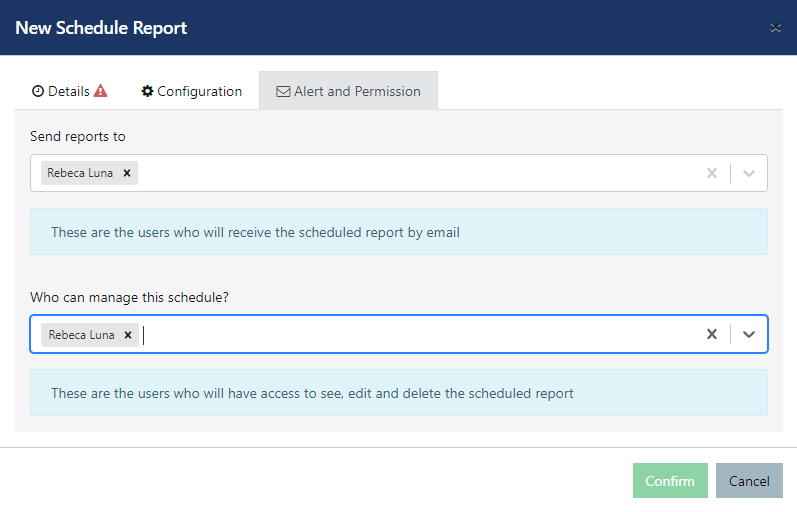
6. Then select the recipients for your report(s) and who can manage this scheduled report on the "Alert and Permission" tab and click to confirm.

