What is the Messaging module?
The Messaging module will allow you to send scheduled SMS and email messages to your drivers. The messages can act as a reminder to complete tasks like submitting a walkaround checklist at the start of the shift/day.
Tip: In order to make use of the Messaging module we suggest you enter a mobile phone number and an email address in each Driver profile.
How to create recurring or scheduled SMS or Email messages
- Click on the “+ New Message”
.
- Firstly, choose one method of the recurring message, either SMS or Email.

Note: There are only two differences between these two methods, one is the title: Title for SMS and Subject for Email.

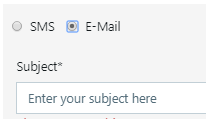
Another one is the word count limit: 150 for SMS and 250 for Email.


3. Then type in the title/ subject for the recurring message.

4. Then select the driver group and the drivers who would receive the message.

5. Then type in the content of the curing message.

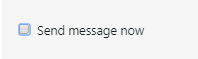
Note: You could skip the above three steps and send the message now by ticking “Send the message now” .
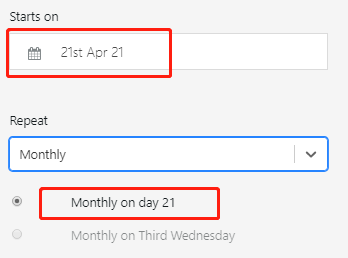
6. Then choose a date and time to send the recurring message.

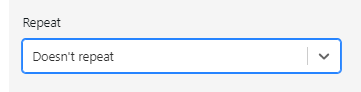
7. Then you could choose Repeat period: doesn’t repeat, daily, weekly, monthly and yearly.

1. Doesn’t Repeat: The message will only be sent once at the chosen time and date.
2. Daily: The message will be sent daily. But you could always choose the intervals between days.

3. Weekly: The message will be sent weekly. You can choose which days of the week to send the message and also the intervals between weeks. For example, if you want to send a message every week Monday - Friday select 'Mon', 'Tue'. 'Wed', Thu' and 'Fri' and then enter '1' to ensure the messages are sent every week.

4. Monthly: The message will be sent monthly. But you could always choose which day in the month and also the intervals between months.

Note: The options for monthly will adjust by itself, it depends on the date that you have chosen previously.
5. Yearly: The message will be sent yearly. But you could always choose the intervals between years.

8. Then you can choose an end time.

9. Once you have completed the above steps, you can save the recurring message by clicking on the Confirm".

10. You could always edit and delete the recurring message by clicking on these two icons.

Tip: For customers using our Walkaround Check modules you can create recurring SMS or email messages to remind which are timed to be sent at the start of each shift to remind drivers to submit a walkaround checklist.
How to view Sent Messages
- Log in to your Transpoco account.
- Click Message on the “Messaging”.
- You will see the default page - “Sent messages”.
- You could filter the report by different types of the messages by clicking on the “Type”.
- You could filter the date, message receivers and messages content by searching the key words in the matching field.
- Or you could search anything you want in the “Search box” straight away on the right top corner.
- You could also change pages either by clicking “Previous” & “Next” or by clicking the number.
- You could also change the amount of rows to view.
- You could view the recurring message report by clicking the “Message” page below the “Sent messages”.
- You could filter the report via status by clicking the drop down arrow below the status column.
- You could filter the report by different types of the messages by clicking on the “Type”.
- You could filter other information by searching the key words in the matching field.
- Or you could search anything you want in the “Search box” straight away on the right top corner.
- You could also view the detailed message information by clicking on the drop down arrow.


