1. How to download the Transpoco Driver app
Download and install the Transpoco Driver app from Google Play or the App Store.
The app is free to download if you have access to the Walkaround module in your Transpoco account

2. How to login to the Driver app
An Administrator will provide a driver with access to the Driver app through the Transpoco account.
The driver will receive a confirmation email and as part of the confirmation process the driver will create a password. The email address for the driver will serve as the username.
After the driver has confirmed their account open the app to the login page.
Enter the assigned username and password and tap on Login.
After you login for the first time your phone could offer you the opportunity to save the login details for future logins.
The very first time you log in, the app may take time to load to the home page.

3. Opening the Driver app
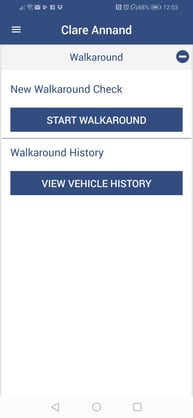
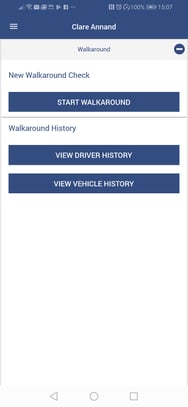
The Drivers app opens to the Walkaround home page which has a link to perform a new walkaround check, a link to view the vehicle history and the Menu (left image).
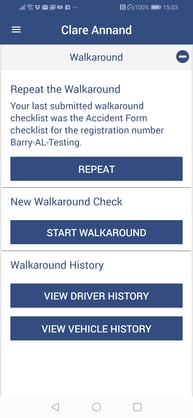
Note: Once you have completed a Walkaround report, the home page will include a link to view driver history and an option to repeat the last check (centre image).
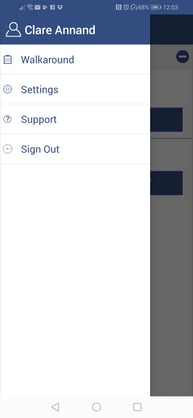
To come back to this page from elsewhere in the app, tap on the three horizontal lines at the top left of the screen to access the drop-down menu and select ‘Walkaround’ (right image).
4. Submitting a walkaround checklist
From the Walkaround Home Page, tap on Start Walkaround.
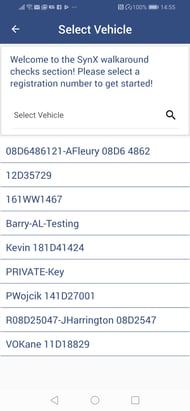
Either scroll down the full list of vehicles or search for a vehicle by typing in part or all of a registration number or vehicle/driver name in the search box.
Tap on the required vehicle.

In our demonstration account we have a lot of demonstration checklists. In most accounts, there will be 2 default checklists; a HGV checklist and an LCV checklist.
You can also create customised checklists, click here to learn more.
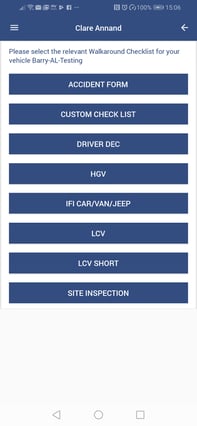
Note: For the purpose of this article, the HGV checklist has been selected. The HGV and LCV checklists are default checklists provided to each customer
Each checklist will differ, as customers to create their checklists to suit their requirements, but this article will demonstrate the experience of submitting a checklist.
You can also create customised walkaround checklists, click here to learn how to create a customised checklist.
When selecting the HGV checklist, you are presented with the option to start with the inside or the outside of the vehicle.
Note: For the purpose of this article, ‘Inside’ is selected first.
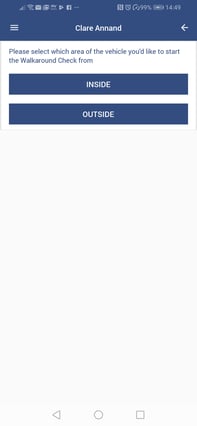
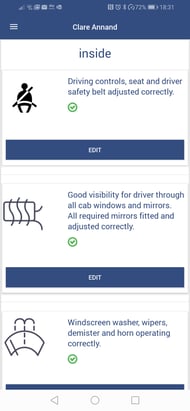
Select Inside.
There now follows a series of questions about the interior of the vehicle – each question must be answered to continue to the next, which will appear automatically.
For each question (except for those that require direct input, such as odometer reading), answer in the positive or negative.
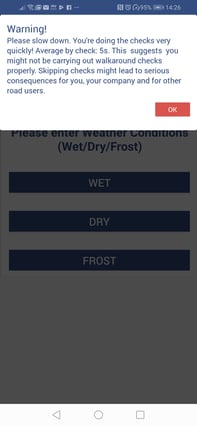
Note: The app measures the time taken to answer each question and if it deems the time is too quick, it will produce a pop-up warning. This is to help ensure that the checks on the vehicle are being carried out.
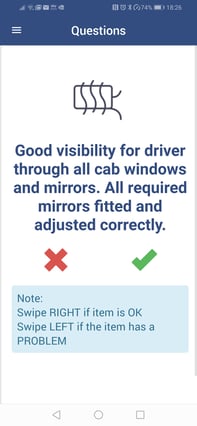
If the response is positive (there are no defects), either tap on the green tick or swipe right.
The app will advance to the next question.
If the response is negative (there is a defect), either tap on the red cross or swipe left.
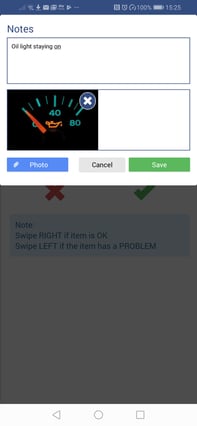
A Notes page will pop up and the app will ask for details on the defect.
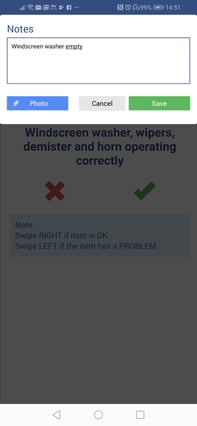
As shown in the above image, type in brief notes about the defect found.
If relevant, add a photo of the defect by selecting Photo.
NOTE: For instructions on how to add a photo from your camera's library or by taking a photo, see Walkaround Checks: How do I add a photo to the Driver app?
Tap on the green Save button.
The app will automatically advance to the next question.
Continue with the rest of the questions for the interior check.
On the final question, enter the number of passengers there will be for that journey; enter 0 if there are no passengers.
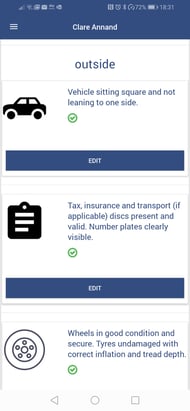
After this last question, the app will take you to the Inside/ Outside menu. Select Outside.
There now follows a series of questions about the exterior of the vehicle – each question must be answered to continue to the next.
Follow the instructions as per the inside questions above.
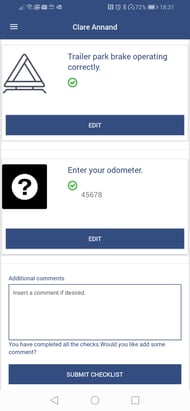
When all checks have been completed, the app shows the following screen:
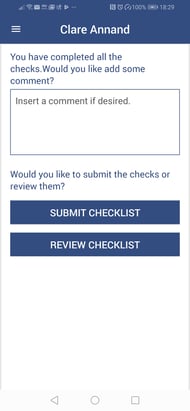
Type any comments or provide further details in the text box if desired.
To submit the checklist without reviewing, tap on Submit Checklist.
To review the checklist before submitting, tap on Review Checklist.
Scroll down to review each check.
Scroll down to review each declaration. Click on Edit for any item that requires amending or additional information.
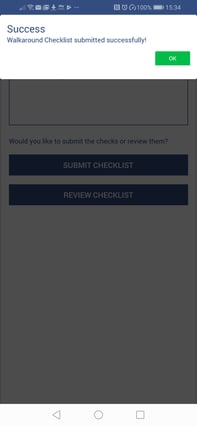
Scroll to the end of the checklist and tap on Submit Checklist.
2) From the Walkaround Home Page, tap on View Vehicle History.
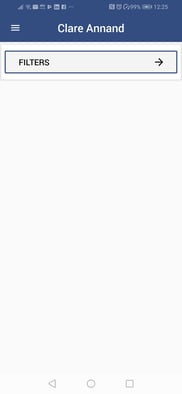
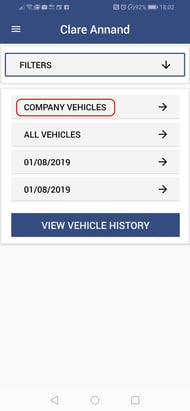
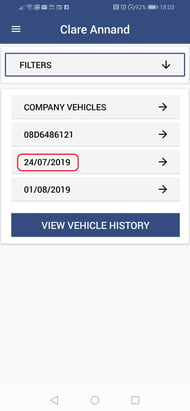
If the categories are not showing (as in right image), tap on Filters (left image).
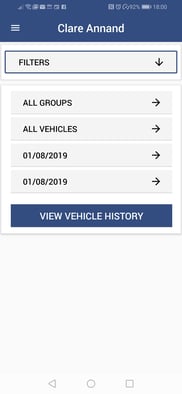
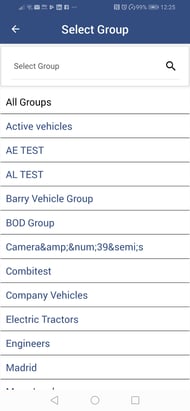
Tap on All Groups if you want to select a vehicle group.
Select the vehicle group from the list, scrolling down or typing in all or part of the group name in the text box if required (the list will filter automatically).
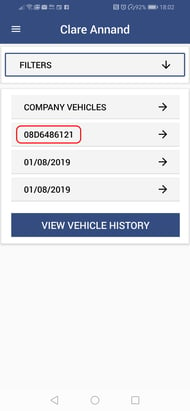
Tap on All Vehicles if you want to select a specific vehicle in your chosen vehicle group.
Select the vehicle from the list, scrolling down or typing in all or part of the group name in the text box if required (the list will filter automatically).
Note: You do not need to select a vehicle group first, but for a large fleet this makes it easier to find a specific vehicle.
To change the dates from today’s date (default), tap on the first date (first image).

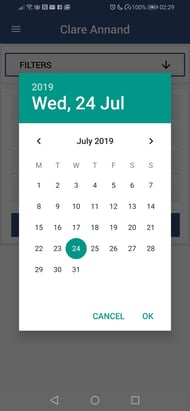
Tap on the required start date in the calendar and tap on OK.
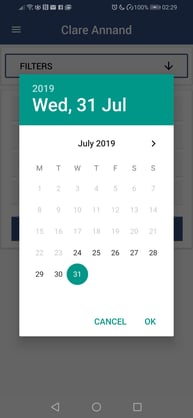
From the Filters page, tap on the second date (first image below).

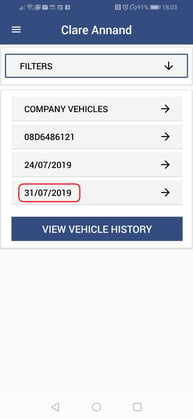
Tap on View Vehicle History from the filters page.
Scroll down to check that all checklists have been submitted.
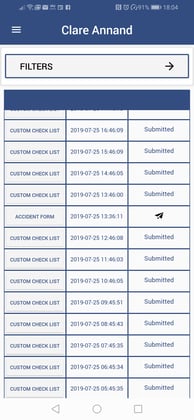
Note: The paper plane icon denotes a checklist that has not yet been submitted.
If there is a checklist that needs submitting, follow the instructions for View Driver History if you were the driver, or contact the relevant driver to request they submit the checklist.
3) From the Walkaround Home Page, tap on View Driver History.
The table shows the checklists you have carried out, with the date and status.

Click on the eye to view that checklist.
If a checklist has not yet been submitted, tap on the Submit button.
4) Select Repeat from the Walkaround Home Page and carry out the checks as per the article Walkaround Checks: How do I perform a walkaround vehicle check using the SynX Driver app?